20 Dec 2011
Posted by Michelle in Recipes | 1 comment
Time for a delicious Christmassy recipe. This time, the very Dutch krestkrans, filled with with almond paste and enveloped in puff pastry, the recipe given to me by my wonderful grandmother (although to be honest, whenever she made this she just threw things in without a strict recipe). This can be fashioned into a wreath, as seen here, or simply into straight lines.
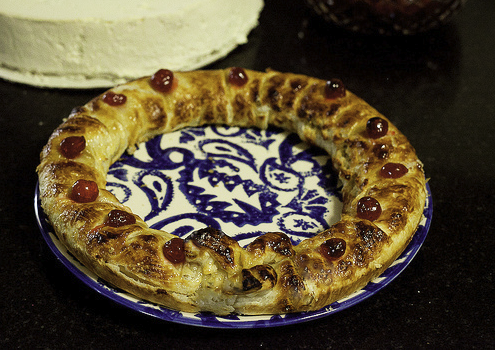
Ingredients:
For the almond filling:
The earlier you can prepare the almond filling, the better. We prepared ours a month before making the kestkrans and stored it in the fridge.
350g of peeled and blanched almonds. (I remember my grandmother employing me as a child having to peel the almonds by hand. Luckily you can now buy them already peeled)
150g caster sugar
The rind of 1 lemon
1 egg
Grind the almonds in a food processor and combine with the egg and lemon rind. Store this in a jar in the fridge and resist temptation to sample before Christmas.
For the pastry:
I used shop bought puff pastry, but you can always make this yourself should you feel so inclined.
Decorations:
Apricot jam
Glacé cherries
Then:
On kestkrans day, take your almond paste from the fridge and taste a little to help inspire you, then remove the rest from the jar and kneed it a little. You can always add a little water if it is a bit dry.
Preheat the oven to 220 degrees Celsius.
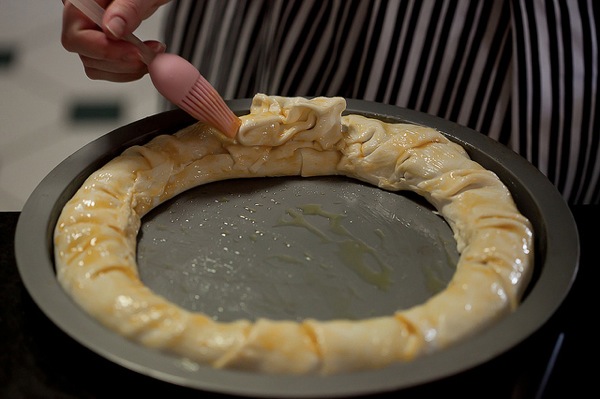
After bushing the pan with some melted butter, cut the puff pastry and line the pan with it, adding a filling of almond paste, and then covering with the remaining puff pastry.
Then it is time to glaze the wreath with a combination of apricot jam heated over the stove for a few minutes with a little water:
And then add the cherries:
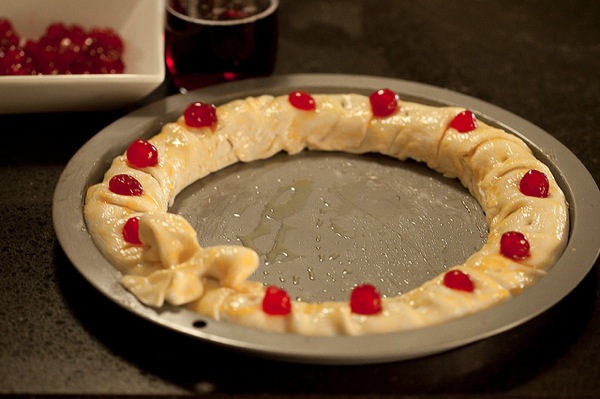
Bake in the oven for 20 to 25 minutes, until nicely puffed and a beautiful golden colour.
Let cool a little and then cut into little pieces and enjoy! The perfect start to Christmas.
23 Nov 2011
Posted by Michelle in Recipes | 0 comments
Here is my old recipe for gingerbread snowflakes. They are delicious and very cute, perfect for Christmas time.

You will need:
- 1/2 cups of brown sugar
- 130 g unsalted butter
- 1/2 golden syrup (or treacle)
- 1 egg, separated
- 3 cups of plain flour
- 1 1/2 tbsp ground ginger
- 1 tbsp cinnamon
- 1/2 tbsp ground cloves
- 1 tsp bicarb soda
- 200 g icing sugar
- Snow flake cutter
Preheat your oven to 180 degrees Celsius.
Combine your butter and sugar in a mixing bowl and when smooth separate your egg and add the yoke into the mix and combine. Combine in the golden syrup.
Sift in the flour, bi carb soda and spices and combine with the rest of the mixture.
Knead into a smooth ball and wrap in cling wrap and then place in the fridge for at least an hour, but I would recommend a couple of days so the spicy flavours thoroughly infuse the dough.
After at least an hour (I left mine in the fridge over night), take the dough from the fridge and lightly dust a clean surface with some plain flour and well as lightly dusting your rolling pin with flour as well.
Take a little of your dough and roll it until it is fairly thin, no more that about 4 mm high and put them on trays covered in baking paper and place them in the oven for about 10 minutes until they are golden brown.
Repeat for the remaining dough.
Once the gingerbreads have cooled, it is time to ice them.
For the icing put your left over egg white to good use by using an electric mixer to mix it until it forms fairly stiff peaks and then sift in the icing sugar and combine. Add in a couple of drops of food colouring if you like. I used a couple of different bowls and added red to one, blue to another and left another white.
The icing part took me a looooong time to get the hang of – not only to get the correct consistency for the icing (add more icing sugar for finer details, water to thin), but also to be able to ice without the snowflakes looking like they had been iced by someone who had just had 7 bottles of vodka. Finally after a about 10 cookies that looked so ugly I made Geoff eat them so they would not see the light of day, I got the hang of it.
I am looking forward to making more soon to practice my icing skills (and because they are delicious!).
27 Oct 2011
Posted by Michelle in Recipes | 3 comments
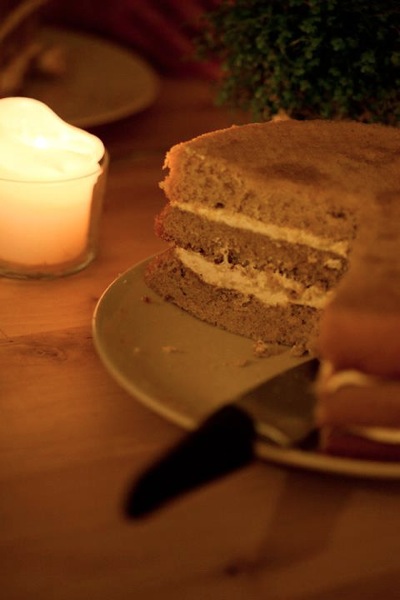
There is nothing I love more in life than a wintery recipe containing cinnamon, and this one, with light and fluffy sponge, drizzled with an almost glühwein flavoured caramelised sauce of cinnamon, star anise, orange, lemon, vanilla bean and pear, was simply divine. It is especially perfect on a cold, Autumn night, with a nice bottle of wine and some good friends.
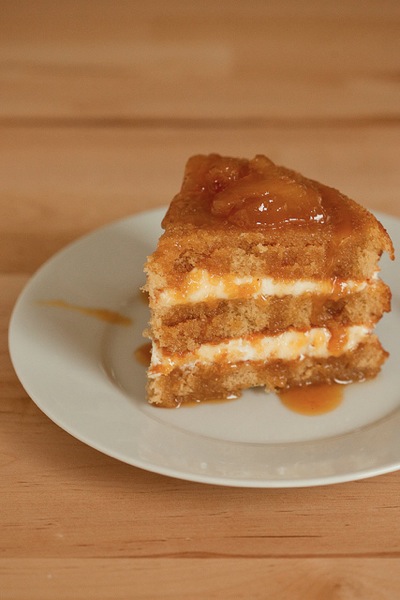
The recipe I used is based on the one found here although as you can see I made only three layers of sponge cake and as a result, made less of the crème fraîche filling. I also added some pear essence to the sponge itself – only 1/4 teaspoon for each layer, and when I make this again, I plan to use at least 1/2 a teaspoon per layer. Don’t be turned off by the sheer number of ingredients or steps, it is much more straight forward than it looks!
The Recipe (for three layers)
Ingredients for the Sponge
9 eggs
120 g brown sugar
120 g caster sugar
1 1/2 vanilla beans (the seeds)
1 1/2 tsp pear essence (not essential)
225 g flour, sifted three times
1/2 teaspoon of baking powder
90 g unsalted butter, melted and cooled
Ingredients for the Filling
500 g crème fraîche
100 g cream
30 g icing sugar
1/2 vanilla bean (the seeds)
Ingredients for the Caramel Pears
700 g caster sugar
Juice and rind of 11/2 lemons and oranges
2 cinnamon sticks
1 star annise
1 vanilla bean (the seeds and bean)
8 ripe pears, cut in half and the core removed (use a spoon if you don’t have a melon baller)
120 ml of desert wine (optional)
100 ml cream
30 gm butter
Method
1. Preheat your oven to 180C.
2. I made the sponge three times as I don’t have an oven that can hold 3 cakes, nor do I have 3 cake pans. If you will also do this, then simply divide the recipe by three and make it three times so that the mixture is still light and fluffy by the time you put it in the oven. Whisk the eggs, sugars and the vanilla seeds (and pear essence if you have it) together until very light and fluffy. This will take around 10 minutes. Sift the flour and baking powder together in another bowl (3 times) and fold into the eggs mixture in two lots. Fold in the butter. Butter your cake tin (20 cm) and carefully pour in the mixture. Cook for 15 minutes.
3. Repeat step 2 twice more if you plan to make each layer at a time.
4. Whip the crème fraîche, cream, icing sugar and vanilla bean seeds together until light and fluffy. Leave in the fridge for later.
5. Peel, halve and core the pears. Add to a large saucepan the rinds, sugar, juices, spices, vanilla bean and seeds, along with 1 litre of water and once the sugar has disoved, add the pears. Simmer with a lid until the pears are tender, and then remove them to a bowl for later. Strain the liquid and simmer again until the sauce begins to reduce and thicken. Add in the butter, cream and desert wine and stir together. Add in the pears again to warm them.
6. Now it is time for the fun! Build you cake, starting with a sponge layer, a little drizzle of caramel sauce, the crème fraîche layer, another sponge layer, repeat, etc. Once you have finished, drizzle the entire cake in your caramel sauce, and place the pears strategically over the top of the cake.
7. Cut and serve while warm. Enjoy!


